
Quick post about the usage of Site-To-Site VPN connection on two Synology devices.
As you know, In my homelab I have two Synology devices – RT2600ac and MR2200ac. Basically, both are used in my home. RT2600ac as a primary router, MR2200ac as an extender. But because now I’m spending a lot of time on another location – you know, garden, sun, beer, etc 😉 I needed to do something to have on-premise resources – like my Synology NAS or whole homelab.
VPN is always a great idea for that kind of case. Using VPN you can have secure access to your resources. Of course – to manage VPN you need to have some knowledge.
Basically, I don’t have a big knowledge about VPN. I know what is it, how to use it, how to basically configure it. So that is a reason, why I decided to use a built-in solution to my Synology devices named VPN Plus Server and Site-To-Site VPN.
This profile will allow you to connect two (or more) locations. But I will use it only to connect two, different networks.
My home network has a configuration:
- IP network: 192.168.100.0/24
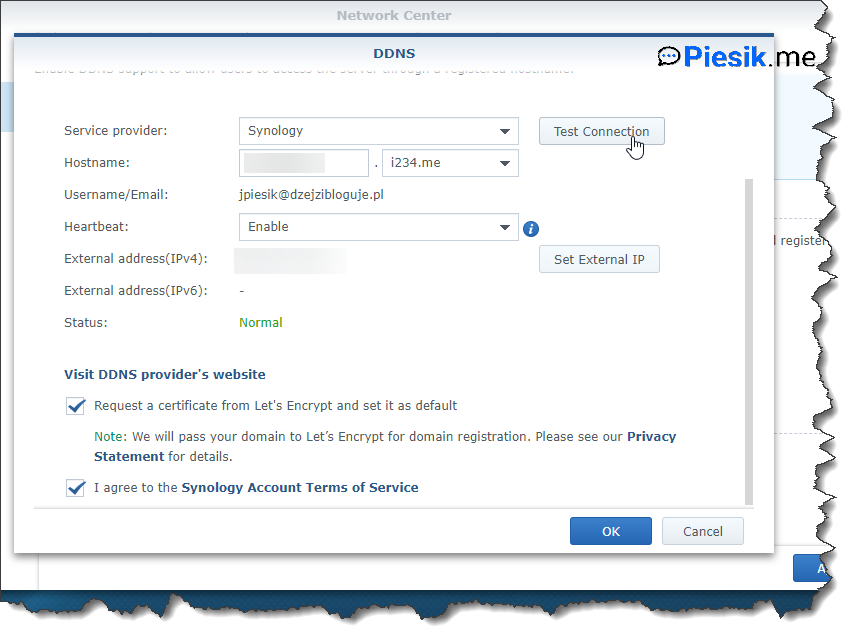
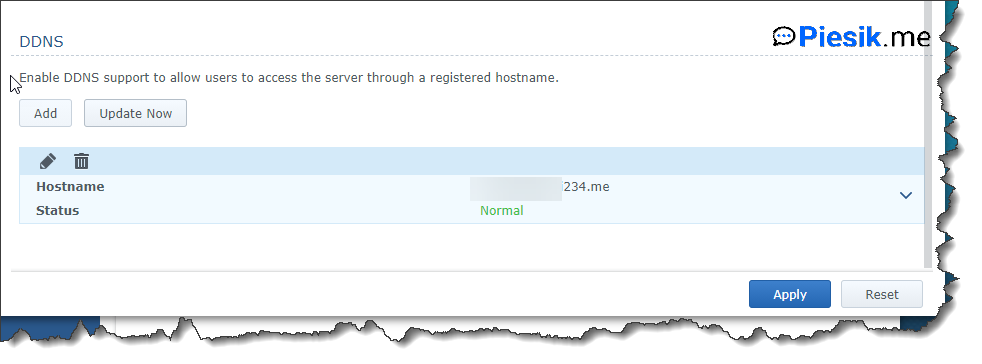
- Configured DDNS service, using Synology services. That will allow me to use hostname instead of IP address which can be changed (I don’t have a static IP address in the home)
Also, the Branch network has a configuration:
- IP Network: 192.168.99.0/24
- Configured DDNS service using Synology services. The second time, because I have connected 4G USB Dongle to this router. I don’t have a static ethernet connection on a remote location.
After an initial configuration, like the network configuration, DDNS services, etc, you need to install VPN Plus Package on both devices and activate the necessary licenses. By the end of September, 2021 licenses are free. After that – you will need to pay for them (I wrote more about this on this article – VPN Connection chapter)
When the package will be installed and activated, you need to click on the Add button and start filling all fields
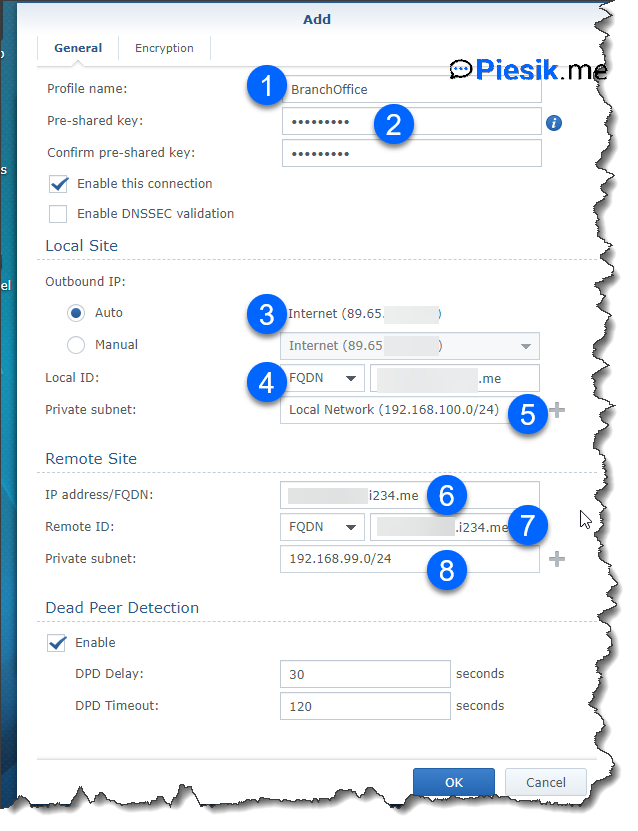
1) Name for the connection 2) “Password” for the connection – to be a more specific, pre-shared key 3) Connection which will be used for VPN. If you have more than one connection, proper need to be selected 4) Here I’m providing the DDNS hostname and selecting FQDN instead of IP 5) To which network VPN should have access 6) Use an FQDN of the second location 7) Like on the below screen 8) Type an IP network of the second location
On the Security tab, I’m not changing anything.
If you are done with filling this VPN connection, you need to export it by clicking to the “Export Profile” button and import on the second device by clicking on the Add > Import manually button.
After a while, a connection should be established and you should have access to on-prem resources.
If you have any questions, leave a comment!
