
Configure Azure AD and add keys to the end-user account (Second part of ATKey Series!)
Apologies for this delay in publications 🙁
The next thing which I want to cover in my blog series is how to use those keys on Azure AD and how the end-user can enroll his ATKey device to secure his account.
We will start with configuring Azure AD first and after that move to the end-user part.
Configure AAD
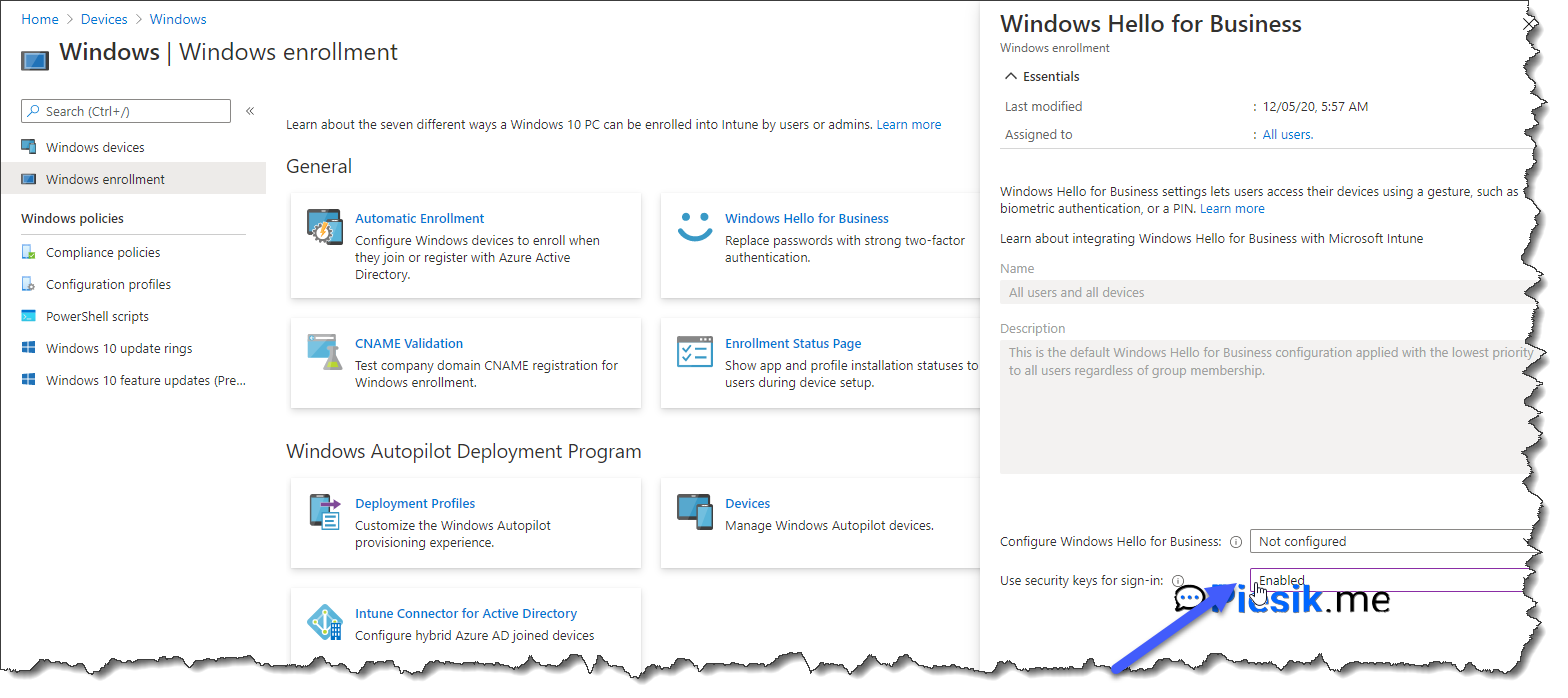
On the first step, we should configure settings for Windows Enrollment using Endpoint Manager Admin Center, by opening this link. To do this, you need to open from left menu Devices > Windows > Windows enrollment > Windows Hello for Business and set Enabled for Use security keys for sign-in.
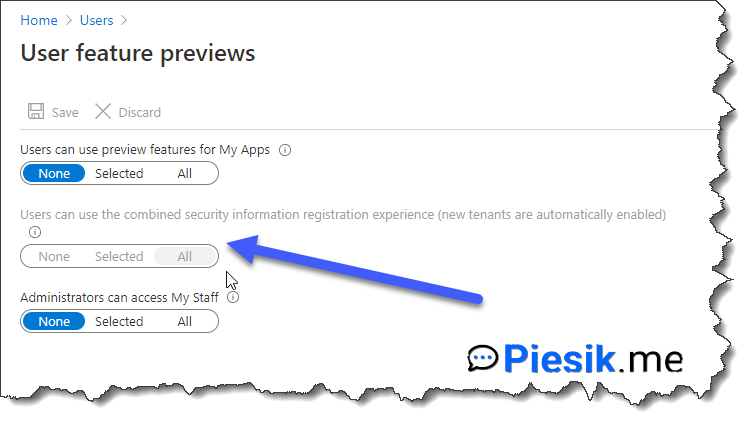
If we have configured Windows Hello for Business, we need to be sure that users can combine security information registration
Important information:
Starting on August 15th, 2020, all new Azure AD tenants will be automatically enabled for combined registration. Starting on December 14th, 2020, all Azure AD tenants with one user will be automatically enabled for combined registration.
So, for all new tenants, this option will be set up as the default for All users.
If you have a tenant created before the 15th of August, you can set up this option by opening Azure AD > Users > Manage user feature preview settings > Users can use the combined security information registration experience (new tenants are automatically enabled) to All
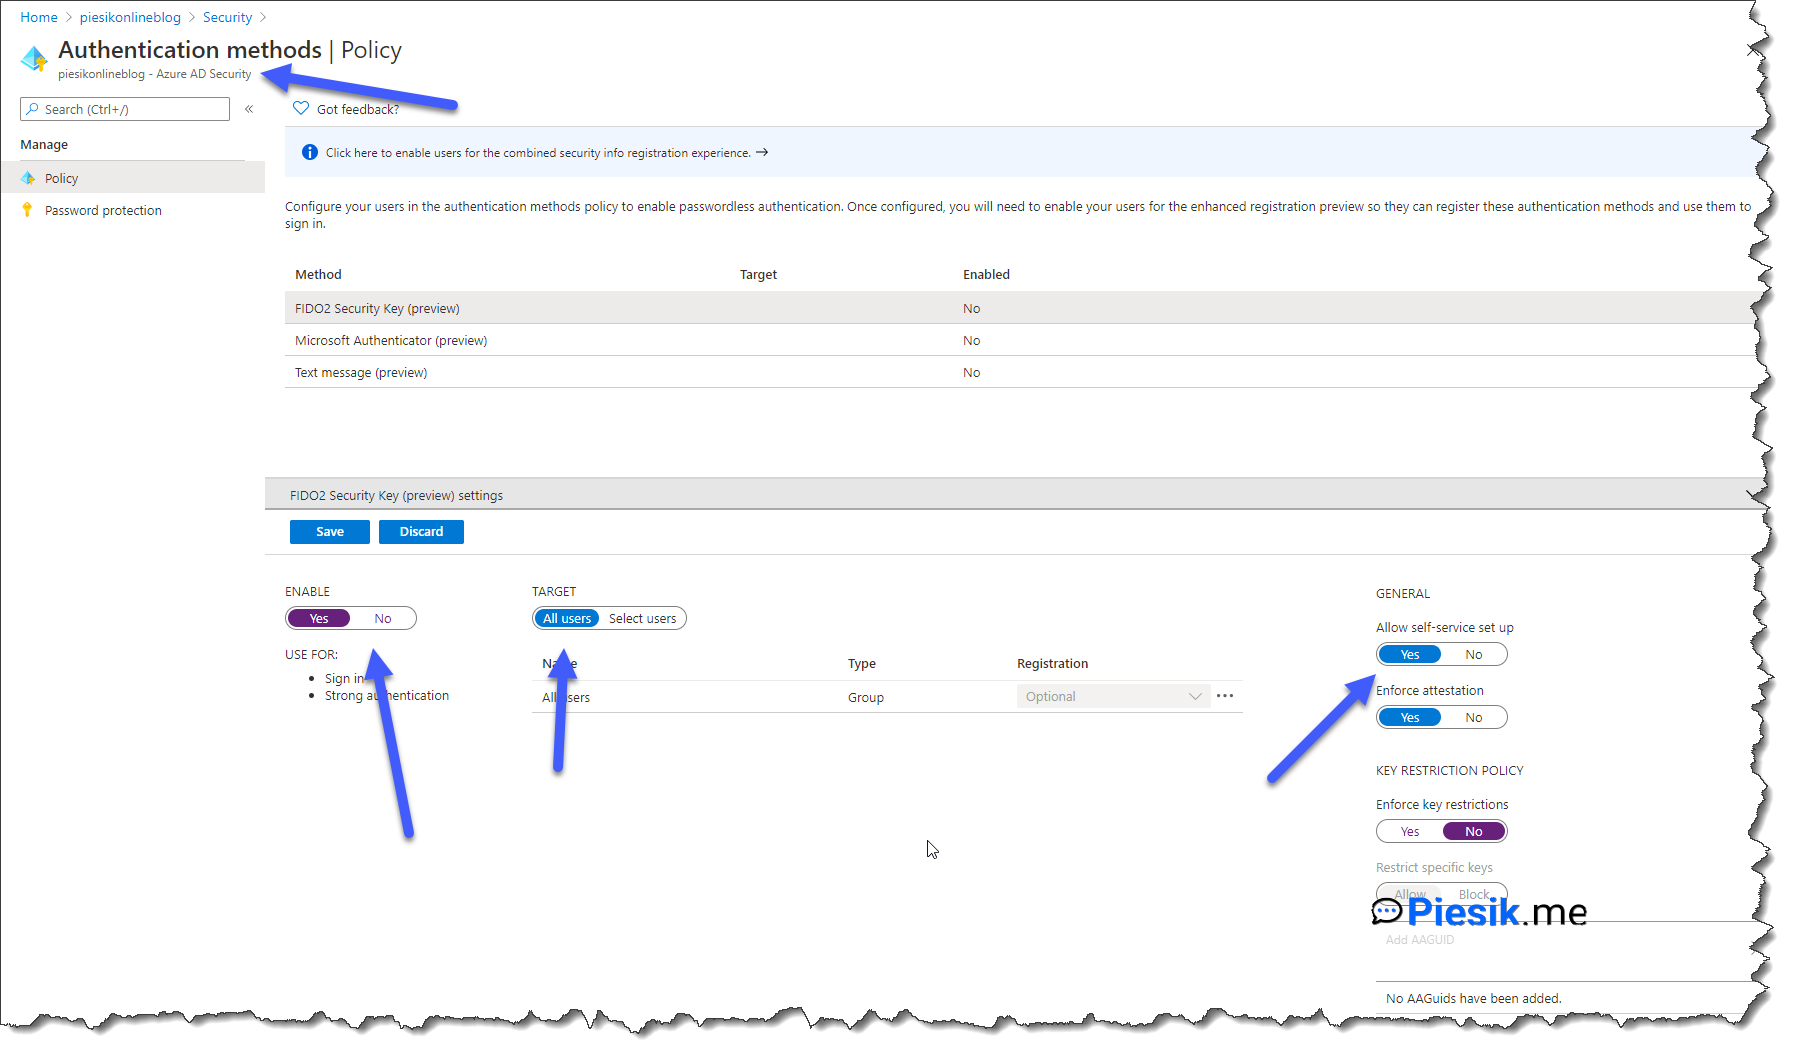
The next step which we need to perform is to allow end-users or selected groups / users to register their own Security Keys.
To do this, you need to open: Azure AD > Security > Authentication methods and select FIDO2 Security Key.
Select Yes for enable, after that decide which users / groups should access this feature and allow self-service set-up. It is an important step. You don’t need to allow for all types of keys, so you can decide which keys are you accepting. To allow only particular keys, please use option: Key Restriction policy
The last step, which we need to do from our side, creates a Configuration profile with Profile type: Identity.
You need to enable option for Use security keys for sign-in.
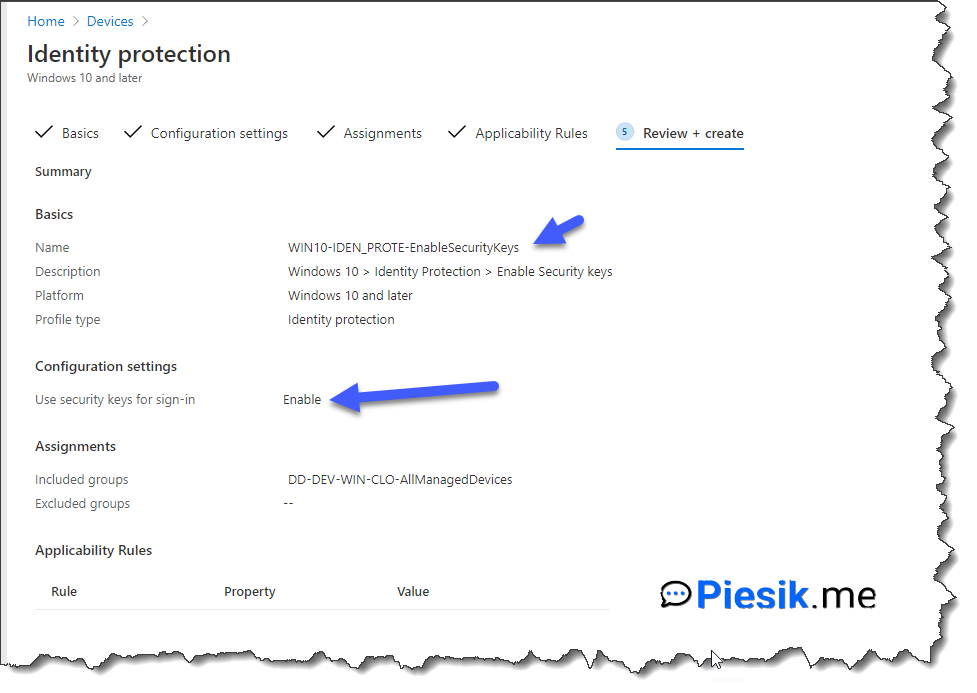
From my side, I deployed it to a dynamic group of devices (NOT THE USERS!). After the reboot, I saw an option to use the security key to login into the device.
End-User side
If we are done with the Administrative side, we can perform steps as end-user.
For example, I have a user with the name: *Andrzej Germanski**. This user will be our tester.
Andrzej needs to open the website: [https://myprofile.microsoft.com] and sign-in using corporate credentials and go to the Security info tab.
For now, this user has added only one sign-in method (Authenticator app), but we will add another. To do this, we need to click Add method > select from dropdown menu Security key and click add. There will be information about the next login with the primary MFA method so, please log on. We will select USB device.
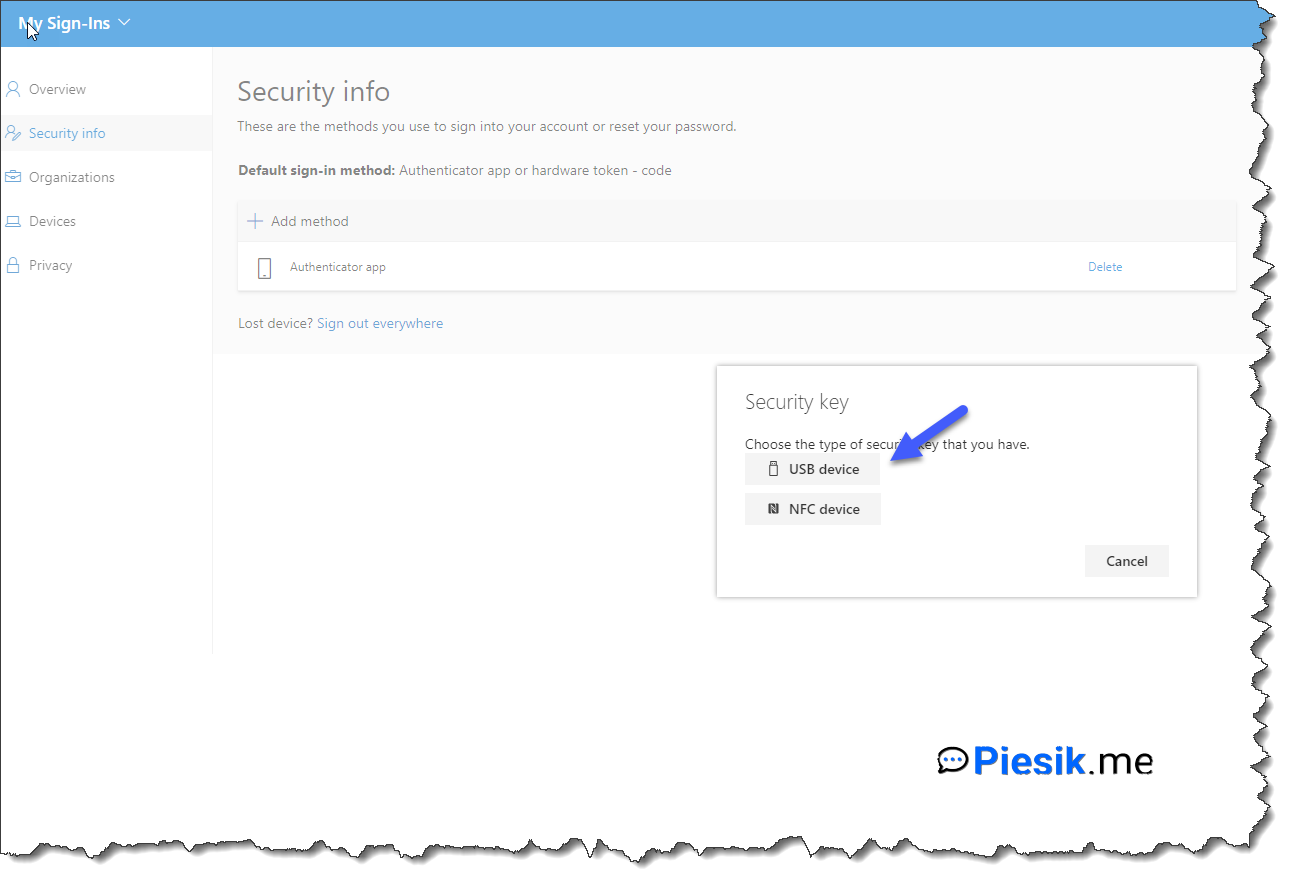
The next thing which we need to do is click Next and plug-in the device to the USB port. You need to allow twice to get information about your security key, set up a new pin for this device. The next step will be enroll your fingerprint and check if the fingerprint was enrolled properly. In the last step, you need to name this security key.
But, what next?
Testing, testing!
After the reboot, Andrzej needs to select *Security Key** as a login option, provide the PIN which was created for this security key, touch the key… And it is everything.
No passwords.
Everything that the end-user needs to remember is an additional PIN. The user password is not visible. Is not required to logon to the workstation.
Amazing, right?
But what with websites?
This same situation as we had with logon to the workstation.
Everything that the end-user need to do is insert your PIN and touch the security key.
NO PASSWORDS!
Let’s move to another post about the usage of those keys.
